How to Choose the Right Duraband Nozzle Band Heater?
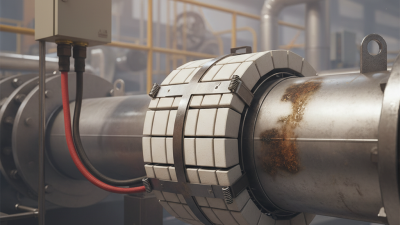
Choosing the right Duraband Nozzle Band Heater starts with the machine, not the catalog. Measure the nozzle’s outside diameter and heated length. Check available voltage, wattage, clearance, and lead orientation. A heater that fits loosely may transfer heat poorly. A heater that crowds nearby components can complicate maintenance.
The U.S. Department of Energy’s Improving Process Heating System Performance: A Sourcebook for Industry treats heating efficiency as a system-level issue. That perspective matters here. Heater output, temperature control, insulation, and operating conditions work together. For selection, confirm the actual process temperature and duty cycle, then compare those requirements with the heater’s rated specifications. Small details count. Even a misplaced thermocouple can create misleading temperature readings.
Plastics-processing author Donald C. Rosato is a recognized technical reference in injection molding. However, I cannot verify a specific, attributable quotation from him about Duraband nozzle heaters, so I will not invent one. That restraint matters: confident-sounding claims are not evidence. This guide instead draws on published process-heating guidance and practical fit checks. It will help readers compare heater dimensions, electrical ratings, construction, and installation needs. Some machine setups still require a technician’s judgment. A catalog match is only a starting point.
Define Resin, Operating Temperature, and the Nozzle’s Thermal Requirements
Choosing a nozzle band heater starts with the resin, not the heater’s advertised maximum temperature. Check the resin supplier’s processing range and note whether the material is moisture-sensitive or prone to heat damage. A narrow operating window leaves little room for guesswork. Record the actual melt temperature during a stable production run, rather than relying only on the controller display.
Next, match the heater’s temperature rating to the nozzle’s working conditions. Consider startup cycles, production pauses, and any temperature changes during purging. A heater that runs near its limit may wear sooner, while an oversized unit can create uneven heating if it does not fit the nozzle closely. Fit matters. Measure the nozzle’s outside diameter and heated length, then check clearance for wiring and nearby components. Even a small gap can slow heat transfer.
The nozzle’s thermal load also depends on its metal, mass, and contact with adjoining parts. Stainless steel and other alloys do not transfer heat identically, so the same heater setting may produce different results. Use a properly placed thermocouple, and compare its reading with the controller. That is not enough. Watch for cold spots near the tip or temperature swings after a machine pause. I would verify these details on the actual setup; drawings can miss worn surfaces, loose fits, or insulation that changes heat loss.
How to Choose the Right Nozzle Band Heater
Start with the resin’s typical melt-processing temperature range, then account for the nozzle’s heat loss and operating conditions.
Bars show representative melt-processing ranges in °C. Actual requirements vary by resin grade, machine setup, and process conditions. Select a heater and control system that can maintain the required nozzle temperature without exceeding the resin supplier’s recommendations.
Compare Heater Watt Density: W/in² = Heater Watts ÷ (πD × Band Width)
For a Duraband nozzle band heater, compare watt density before comparing total wattage.
Use W/in² = heater watts ÷ (π × band diameter × band width), with dimensions in inches.
For a 1,000 W heater measuring 4 inches in diameter and 2 inches wide, the result is about 39.8 W/in². Check the math.
This estimates heat applied across the band’s cylindrical surface; it does not account for heat loss, nozzle contact, or insulation.
That distinction matters. The U.S. Department of Energy’s Improving Process Heating System Performance: A Sourcebook for Industry estimates that process heating uses about 2.3 quadrillion Btu annually in U.S. manufacturing. The figure is broad, but it underscores why heat transfer and control deserve attention. A high watt density may bring a nozzle up to temperature faster, yet can also create uneven heating when contact is poor or the process has limited heat removal. A neat number can still mislead.
Compare the calculated density with the heater maker’s stated operating range and your process temperature. Check the nozzle diameter at the heated section, not a nearby shoulder. Confirm the actual band width, too. Small measurement errors change the result. Then observe temperature stability under production conditions; a handheld reading at one point may miss a hot edge. I would not choose from watt density alone. It is a useful screening value, not a full thermal design.
Match Electrical Load to Supply: Current in Amps = Watts ÷ Volts
Choosing a nozzle band heater means matching its electrical load to the available supply.
Use the nameplate values: current in amps equals watts divided by volts.
A 1,200-watt heater rated for 240 volts draws 5 amps.
Check the circuit’s voltage and available capacity before selecting a heater; a correct wattage alone does not confirm compatibility.
Worth checking twice.
ANSI/NEMA C84.1-2020 identifies common North American nominal service levels, including 208 and 240 volts.
These figures matter: a 240-volt, 1,200-watt resistive heater connected to 208 volts would draw about 4.33 amps and produce roughly 903 watts, assuming its resistance stays constant.
It may heat more slowly than expected.
The calculation is useful, but it cannot replace the heater’s rated voltage or the equipment manufacturer’s instructions.
Also verify wiring, connectors, and control-device ratings.
A loose connection can create a hot spot near the band, even when the calculated current appears suitable.
Check the actual supply with a meter, and confirm the circuit rating with a qualified electrician.
Select a Type J or Type K Thermocouple and Closed-Loop Temperature Control
Choosing the right nozzle band heater starts with matching the thermocouple to the process, not just the controller socket. Type J suits many moderate-temperature applications, while Type K provides a broader measurement range. NIST Monograph 175 gives ITS-90 reference tables spanning approximately 0–760°C for Type J and −270–1,372°C for Type K. These are reference-table limits, not guarantees of safe service life; sheath materials, atmosphere, and installation affect practical limits. Check that the controller input, extension wire, and sensor type all match. Small detail. It matters.
Closed-loop control uses the thermocouple reading to adjust heater output as conditions change. Place the sensor firmly against the nozzle or in its intended pocket, close to the heated zone. A loose sensor can report a temperature that differs from the metal surface. The displayed setpoint is not the melt temperature. A PID controller can reduce overshoot, but poor sensor contact or aggressive tuning can still cause temperature swings. ASTM E230/E230M specifies standard thermocouple tolerances; at 500°C, NIST’s 0°C-reference tables give about 27.393 mV for Type J and 20.644 mV for Type K. Verify the controller’s calibration and wiring before commissioning. Recheck readings after thermal cycling, because mounting pressure can change.